RethinkTrends

Lifestyle

reduce stress

Self-care activities to reduce stress

Life can be difficult sometimes. We all deal with things that take a toll on us. Stress and anxiety have become a part and parcel of life. Whether it is heart break, work stress or family issues, we often tend to put others before us and forget to take care of ourselves. When this happens, it can also adversely affect your physical health.   Healthy living starts with taking utmost care of yourself. This doesn’t just mean that you should eat on time and get proper sleep, but also taking care of yourself when you are mentally exhausted. Practicing self-care frequently helps you to deal with situations in a calmer manner, promotes good-decision making and help to improve your overall mental and physical health.  Here are 8 self-care activities that you can implement to stay on top of your game.  Reading and Writing If you are a bookworm or like to play with words, this is the perfect activity for you. Reading not only helps you become knowledgeable but also helps you take your mind off stress and help you calm down.   One of the best ways to reduce stress is Journalling. You can maintain an everyday journal or write down your frustrations on a piece of paper whenever you feel anxious or stressed to avoid impulsive behavior.   Be Artsy Art has proven to be a great form of expressing one’s emotions and feelings. Be it painting, doodling, sketching, drawing, digital art, or even crafts, engaging in artistic activities not only helps you to concentrate on the present but also helps you to express your emotions effectively.   Exercise Time and again, fitness has proven to be great for self-care. What better way to take care of yourself than taking care of your body? May it be sports, a simple walk or a jog, working out at the gym, or any other form of workout, it helps to release your stress and frustrations. Frequent exercising not only helps you de-stress but also keeps you physically healthy. Moreover, having a fit body also helps to boost self-confidence.  Try cooking Cooking can be highly therapeutic, especially if you are a foodie or like to cook. This therapeutic took combines practice, technique, and creativity at the same time. This helps to increase your sensory awareness. It requires you to concentrate on multiple aspects at the same time which helps you to concentrate better. As it requires you to compartmentalize your thoughts, it helps your mind to focus on the present. Moreover, if you are a person who expresses your love through acts of service, cooking is a great way to cook for your loved ones and enjoy the fruits of your labor! This helps to achieve a sense of productivity and the compliments you get will definitely help you feel better.  Movie Marathons! Whether it was a bad day at work or an argument with your loved one, entertainment is always your buddy. So, grab your popcorn and snacks, wrap yourself up in a cozy blanket and enjoy the next two hours of action, drama, thrill, comedy, and romance. Whatever your mood, there is always a movie for you!  Talk Talk it all out and get it off your chest! Talking to your friends or loved ones about your struggles helps a lot. Knowing that there are people who support you and listen to you, and moreover, empathize with your situation may help you feel a lot more supported and heard.  The Sound of Music When you reach of complete frustration, just put on your earphones and listen to music. It can be sad, happy, hip-hop, or even death metal. Whatever you feel like. In fact, Music Therapy is a field in Psychology that uses music-based experiences to focus on the client’s problems and needs.   Meditation Meditation has proven to be a great tool that can help you to de-stress. Just 5 to 10 minutes of meditation a day helps you to calm yourself down, gather, compartmentalize your thoughts and refocus.  Last but not the least, make sure to set healthy boundaries. Know when to stop and prioritize your mental health during stressful situations. Give your mind and body the support, encouragement, and love it needs. 

Self-care activities to reduce stress Read More »

Ginger shots - Its versatility easy to make recipe and how it is a powerful boost to your overall health

Ginger shots- A powerful health booster

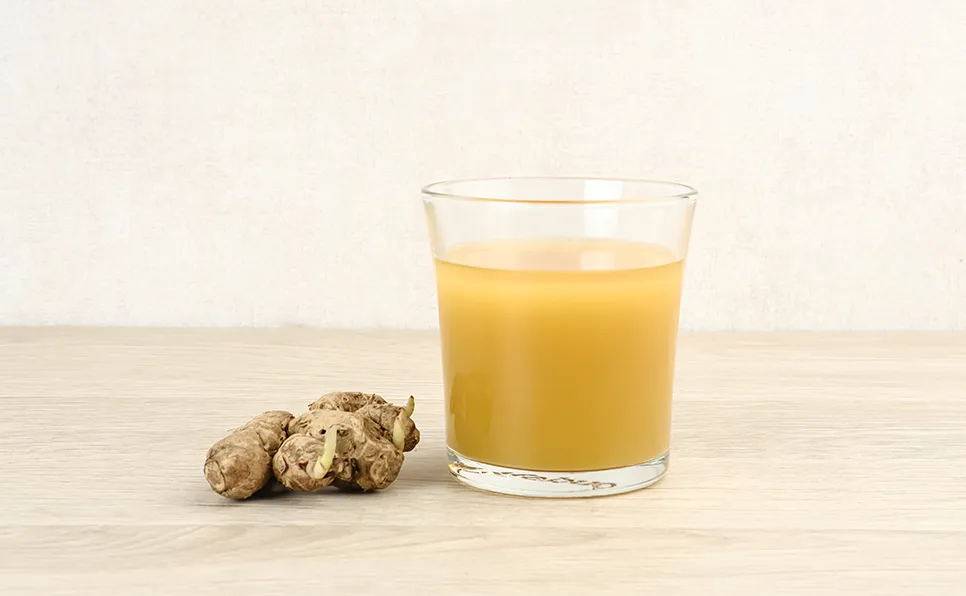
Seems like we are back in the era of homemade remedies. Why spend your money on allopathic medicines when you can take proper precautions at home? This article talks about the versatility and benefits of ginger shots and how it is a great boost to your immune system. Common household ingredients like turmeric, cloves, garlic, etc., are widely used for their anti-inflammatory properties. And one such root vegetable that is used since ancient times is ginger. Whether you have a cold, cough or you are feeling a bit under the weather, the medicinal properties of ginger have got you covered. As flavorsome as it is, it contains Vitamin C, Vitamin B3 and iron which is great for your health. Shots! – But it is made of ginger When you come across the word ‘shots’, you may automatically think of Vodka or Tequila shots. But have you ever heard of a shot that is anti-inflammatory, prevents cold and cough and is good for your gut? Ginger shots are next big thing! They are a great way to promote good health along with their spicy, almost refreshing taste. As mentioned earlier, in the olden days, ginger was highly used to recover from a cold or cough, or to restore your gut health. Later, due to its refreshing taste, it started being used in soups, cocktails, mocktails, and juices. Such is the versatility of ginger. With the boom of TikTok, the aesthetic of having a healthy lifestyle is back. And it asks a very important question- Why spend money on expensive medicines and health care when you can take care of yourself at home? Ginger shots are basically concentrated ginger juice along with some other type of juice. As concentrated ginger has an unpleasant and strong taste, it is mixed in with other liquids. It is usually taken in very small quantities, usually about 10ml to 40ml and is usually consumed first thing in the morning after you wake up, preferably with an empty stomach. How can you make ginger shots are home? You can find ginger shots or concentrated ginger juice in your local grocery store or at any supermarket. Usually, such packed juices have added sugar and preservatives to maintain a longer shelf life and may not be as fresh. But worry not my friend as its very easy, healthy, and pocket friendly to make it in your kitchen. All you will need is some -root ginger (depending upon the quantity you want to make it) -some additional lemon or orange juice (if needed) -honey (if needed) This recipe can be made with a juicer/blender or without one. If you’re making it in a juicer or blender- Thoroughly wash and chop up the ginger roots and add it in your juicer or blender. Once you get the concentrated ginger juice, you can even run it through a muslin cloth or strainer to get rid of any unpleasant bits. You can then add some lemon juice or orange juice for some additional citrus flavor and vitamin C along with some honey. You can also add some water to dilute it a bit. If you’re making it without a juicer- Thoroughly wash and peel the ginger roots. Once peeled, finely grate them. Now, take a bowl and place a muslin cloth on the bowl. Take the grated ginger and strain it thoroughly through the muslin cloth. Once strained, you can now add some additional juice, honey, or water as per your taste. And here you go! Now you can make ginger shots at home with ease. What are the benefits of ginger shots? It is no surprise that ginger is great for your overall health and has numerous benefits. In an interview (Carpool Karaoke) with talk show host James Corden, singer and actor Selena Gomez said that she takes ginger shots every day in the morning to sooth her throat and prevent getting sick. Well, apart from such celebrity advocations, here are a few reasons why you should befriend ginger shots: It is versatile Time and again, ginger has proven to be highly versatile when it comes to cooking. You put it in a hot soup or a cold beverage, you can consume it raw or cooked and you can add it in sweet as well as savory dishes. It is there for you in sickness and in health. And the best part is that it is a natural anti-oxidant! A buddy for your gut Ginger is great for your gut. You can have ginger shots when you have nausea, acidity, gas or general indigestion. Having a shot of ginger first thing in the morning can also increase your metabolism- and with addition to daily exercise, it can aid you lose weight more efficiently. It can also help to improve your overall gut health. A warm hug for when you are feeling a bit under the weather Since ancient times, the healing properties of ginger, along with honey, has been used to prevent cold and cough. A combination of honey and ginger shots is best when you have a cold as it soothes your throat and helps with inflammation when your body is sore and tired. Improves circulation Ginger shots help you to improve your blood circulation and is great for your heart. It helps to regulate blood pressure. For folks who suffer from Type 2 diabetes, regular consumption of ginger shots are a great way to regulate your sugar levels. Signing out With the popularization of ginger shots, it has proven to be a great home-made remedy time and again. A regular dose of ginger shots is a powerful boost to your health and another great thing which comes with that is that you can customize it according to your liking and enjoy!

Ginger shots- A powerful health booster Read More »

Health Benefits of Pine Needle Tea

Health Benefits of Pine Needle Tea

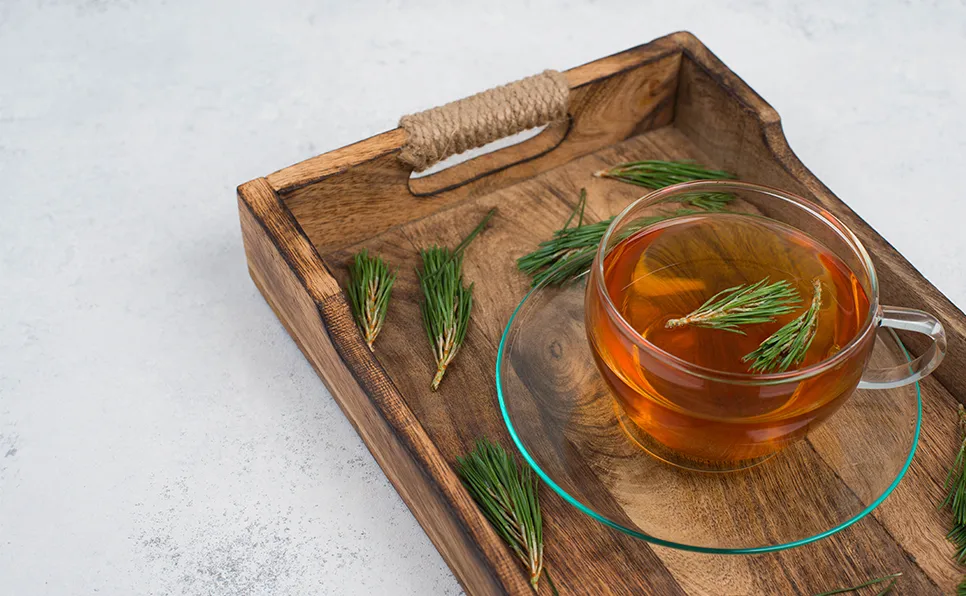
Introduction Who doesn’t like a hot cup of tea in the morning or at the end of a long day at work? Have you ever considered changing your taste for tea to a better habit of choosing health-beneficial ones while it still remains your favorite beverage? Everyone appreciates going on walks in areas with fresh air, and to see pine trees all around you with their lemony scent and the ground covered in soft, spongy needles is the icing on the cake. Also, have you ever heard of pine needle tea? Well, in addition to appreciating the beautiful trees outdoors, have you ever thought that you can actually bring pine needles to your use to make a delightful and nourishing tea? Let’s learn more. What Is a Pine Needle Tea? The needles of specific pine trees are used to make the tea known as “pine needle tea.” In various cultures, it has been used as a traditional treatment and is said to provide several health advantages, including enhancing the immune system, lowering inflammation, and enhancing lung health. Tea made from pine needles has a flavor that is a little bit bitter and a crisp pine fragrance. Fresh pine needles from a non-toxic type of pine tree are required to create pine needle tea. Scots Pine (Pinus sylvestris) and Pinus Densiflora (Japanese red pine) are two typical species used to manufacture pine needle tea. Before usage, the needles need to be cleaned and dried. You may use either fresh or dried needles to prepare the tea. To make the tea, you can either use fresh or dried needles. If using fresh needles, steep a small handful of needles in hot water for about 5-10 minutes. If using dried needles, steep about 1 teaspoon of needles per cup of water for about 5-10 minutes. Strain the tea and add honey or lemon to taste if desired. Why Has Pine Needle Tea Gained So Much Popularity? Some possible factors for pine needle tea gaining so much popularity could include: Traditional uses: Pine needle tea has a long history of use in traditional medicine in some cultures, and it may have gained popularity due to its reputation as a natural remedy for various health conditions. Health benefits: Pine needle tea is believed to have several health benefits, including boosting the immune system, reducing inflammation, and improving respiratory health. These potential benefits may have contributed to the popularity of the tea. Unique flavor: Pine needle tea has a unique, piney flavor that may be appealing to some people. Natural appeal: Many people may be drawn to pine needle tea because it is made from a natural source and does not contain any artificial additives or preservatives. Health Benefits of Drinking Pine Needle Tea Pine needle tea is made from the needles of certain pine trees and is a traditional remedy in some cultures. It is believed to have several health benefits, including: Boosting the immune system: Pine needles include vitamins A and C, which are necessary for a variety of body processes, such as the generation of red blood cells, the growth of hair and nails, and the maintenance of a strong immune system. Reducing inflammation: Pine needles contain anti-inflammatory compounds that may help reduce inflammation in the body. Improving respiratory health: Some people claim that pine needle tea can help to clear congestion and improve respiratory function. Reducing stress: Pine needle tea has a refreshing, piney aroma that may help to reduce stress and promote relaxation. Many individuals believe that the aroma of pine needles alone is uplifting and joyful. Supporting heart health: Pine needles contain antioxidants that may help to lower blood pressure and improve cholesterol levels, which may support heart health. Weight Maintenance: Pine needles have an anti-obesity impact, according to recent studies. Wrapping It Up Although pine trees are often associated with the winter, their leaves are extremely valuable all year long. Pine needles have a powerful punch, whether you’re seeking for an energizing aroma or an antioxidant-rich tea! However, it’s important to note that pine needle tea can be toxic if made from certain types of pine trees, such as the yew tree. If you are considering trying pine needle tea, it is important to make sure that you are using needles from a safe species of pine tree. It is also important to talk to a healthcare professional before adding pine needle tea to your diet, as it may interact with certain medications or have other potential risks.

Health Benefits of Pine Needle Tea Read More »

How to Treat Chemical Burn on Face from Skincare

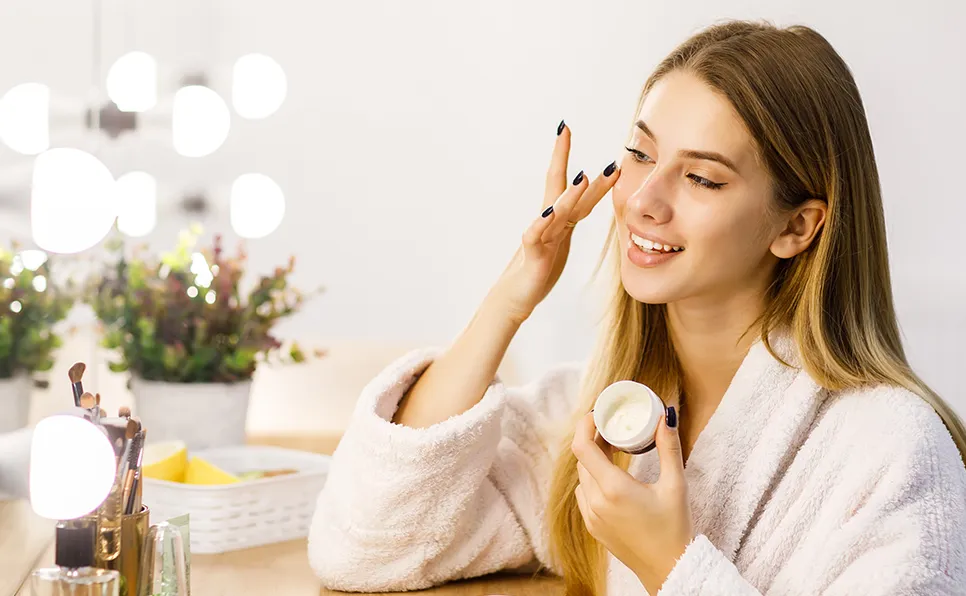
Introduction Present-day skin care products come in a wide variety. You may find any skin care item that satisfies your requirements and expectations, from items created for dry skin to those made for oily skin. It involves time and several trials and errors to improve one’s skincare routine. Skincare, however, may cause a chemical burn on the face if someone uses too strong of an acid exfoliant or uses it too frequently. This is especially true if you enjoy the skin-improving effects that chemical exfoliators like AHAs and BHAs have but don’t yet know how to use them properly. If applied inappropriately, a single treatment session might result in chemical burns. Hence, it is important to treat chemical burns caused by skincare products at the earliest possible. What Causes Chemical Burns on Face from Skincare Skin burns are typically caused by fragrances and preservatives. Even products that claim to be “unscented” may include a fragrance that hides chemical scents that might trigger an allergic reaction like mild rashes. Inappropriate cosmetics may aggravate an existing problematic skin condition, such as dryness or even oiliness. Use of highly abrasive products, such as foamy cleansers, can cause the acid mantle of the skin to peel. Hence, before you purchase a cosmetic item, you should be aware that not all facial features, including lips and eyes, have the same type of skin. It’s important to understand that a brand’s lipstick may not be appropriate for your skin type even if their foundation is. Chemical burn signs and symptoms include: Inflammation or skin discoloration A scorching feeling Feeling of pain Numbness Blistering Pro tips: Anyone exhibiting any of these symptoms should remove any contaminated items and wash their skin for 20 minutes under running water after using a skin care product. It is essential to keep your distance from the runoff water. Tips for Treating Skin Burns Caused using Cosmetics Skin blisters, known as chemical burns, are caused by very acidic or alkaline chemicals. Certain skin care products or techniques could be too acidic to cause one. When using a skin care product, anyone who feels any pain should stop using the product immediately. Burning and pain are not signs that a product is working as it should. Instead, they serve as skin damage warning signs. Here are some suggestions to help you get treated and recover if your skin feels like it’s burning up as a result of chemical interactions with your skincare products: Don’t use any skin care products anymore: If you get a skin burn, stop using any skin-care products right away, including retinol, salicylic acid, and glycolic acid because doing so might make the situation worse. Instead, stick to washing, toning, and moisturizing with mild products, rather than utilizing any products intended to “cure” or treat any chemical burn. Focus on restoring the lipid health of your skin: Since skin burns from cosmetics can disrupt the skin’s moisture barrier, which can lead to sensitivity and irritation, it is important that you focus on restoring the lipid health of your skin. Consider improving your skincare routine with ingredients like hyaluronic acid, glycerin, ceramides, and squalene to refill the skin’s moisture barrier and restore it back to health. Include skin-soothing products in your routine: Add skin-soothing products into your skincare regimen. To relax and reduce inflammation, soothing chemicals are dosed for skin that has been burnt or irritated. Use products with ingredients from licorice root, aloe vera, centella asiatica, allantoin, and bisabol to enhance your skincare routine. Apply sunscreen: You should always apply sunscreen after using any skincare products. This is crucial if you recently experienced skin blistering as a result of applying the wrong cosmetics. Because the skin becomes too sensitive to sun exposure during the healing process, a broad-spectrum sunscreen will keep the skin protected from UV rays as it recovers. Wrapping It Up Until you discover the skin care solutions that work the best for you to treat chemical burns, it takes years of evaluating various options. Once you’ve discovered the products that are effective for you, you must be careful not to use them excessively because doing so might harm your skin. Avoid brands that provide items that cause acne or dry out the skin when picking one. It will be advantageous to test out various products to determine which one feels good on the skin. Always do a patch test to see whether any of them irritates or causes allergies. Any specific cosmetic will respond right away and irritate the skin, which might result in allergies. It is advisable to speak with a doctor after thoroughly washing the skin. Anyone with severe or persistent symptoms ought to see a doctor. Hope this post has helped you understand how to treat chemical burn on your skin caused by skincare products that unfortunately, did not fit you!

How to Treat Chemical Burn on Face from Skincare Read More »

Swiss cheese plant

How to propagate Swiss Cheese Plant?

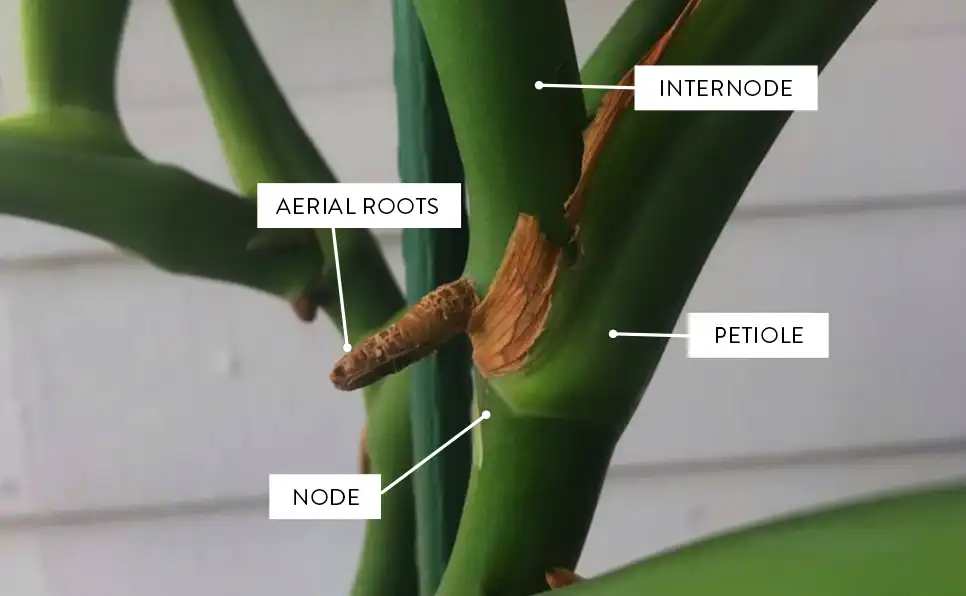
Are you planning to ramp up the aesthetics of your home or workspace organically while cleansing the aura and the air, all at the same time? Then try planting Monstera deliciosa, also commonly known as, the Swiss Cheese Plant. The scientific name of this species defines its two main characteristics. The genus Monstera comes from the Latin word, meaning monstrous, hailing from its large leaves while the specific name deliciosa signifies the delicious fruit, this plant bears. Often described as a joint taste of mango, banana, and pineapple, the fruit of the Swiss Cheese plant, once ripens, is a treat to the palate of many. Swiss Cheese Plant is often the “go-to choice” for anthophiles because of its low maintenance, ease to grow, and high resistance to varying weather conditions. Mainly used for ornamental quality, Monstera deliciosa also helps in purifying the air, and dehumidifying abilities and is considered an exotic feng-shui collectible. The characteristic feature of this tropical plant is its fenestrated leaves for which it is prized. Swiss Cheese plant can grow to a huge size and features aerial roots that grow downwards from the stem. Once it touches the ground, it can spread out and binds to the soil. Native to tropical forests of North & South America, Monstera deliciosa has found its way to living rooms because of its capability to adapt to a wide range of conditions. Before we learn how to propagate the Swiss Cheese Plant, it is important, we know the basics of cutting. Cutting Swiss Cheese Plant: Select the main vine or branch. Get rid of the aerial roots and dried leaves. Identify the nodes. Cut the vine above or below the nodes. Do not cut at the nodes. Cut at the benign area. You can choose to propagate a single node. If the spacing between the nodes is less, you can propagate multiple nodes. 3 ways to Propagate Swiss Cheese Plant: Once you are done cutting from the mother plant, you can propagate the Swiss Cheese Plants in three mediums: Soil Propagation Water Propagation Moss Propagation Each of the propagation method is fairly simple as the plant doesn’t require much effort to help it grow. If you want an easier way to propagate Swiss Cheese plants, the water propagation technique is the answer. Whereas, if you want to save time, you might wanna go for the soil propagation method. And if you are a pro at growing plants, and gardening, and you know what you are doing, Moss propagation is recommended as it yields the best result. Soil Propagation: This process requires around one to three months for the Swiss Cheese root cuttings to show any sign of development. But most importantly, this will save you from the need to repot the plant and hence saves time. Choose a pot proper for the size of the root cuttings. Make sure the pot has holes at the bottom because Monstera deliciosa thrives well if the soil can drain excess water. Excess clogged water will stunt the growth of the plant. Fill the pot with normal potting soil that drains well. Potting soil can be made up of 60% peat moss or coco coir, 20% Pumice or coarse sand or perlite (for better drainage), and 20% organic matter like compost or worm casting. Also, ensure that the potting soil is free of water-retentive gels. Place your root cuttings in a way that buries the nodes under the soil. Water Propagation: The second and easiest way to propagate the root-cuttings of the Swiss Cheese Plant is by water propagation. Transfer the root-cuttings to a water jug. Make sure the vessel you choose is sufficiently large because once the plant starts to propagate, it’ll be cumbersome to transfer it to a new pot. Submerge the root-cuttings or the vine in a way that the nodes are fully underwater. In about three to four weeks, you should see new roots and small leaves sprouting from your freshly cut vine. That way, you’ll know the propagation was successful. Moss Propagation: For this technique, you can use Sphagnum moss. Mix some water with Sphagnum moss and put it in a pot. Dip your root cutting into the mixture, till the mixture a little, and fill the pot with some more Sphagnum moss. Make sure the nodes are covered. Sphagnum moss will develop hefty roots. Once you are done with propagating, now it is time to re-pot the newly propagated Swiss Cheese Plant. Repotting: Once the Monstera deliciosa starts to grow, you need to re-pot it so that the roots can grow. The more the root system develops, the bigger the leaves will be, and the better the fenestrations. As the plant keeps getting progressively bigger, ensure to re-pot accordingly. Use soil that drains well and a pot that has holes at the bottom to prevent water clogging. Light: The fact that Swiss Cheese plant can be grown indoors rely on the aspect that they do not need direct sunlight. Avoid direct sunlight as it might burn or cause mechanical damage to the plant. Keep your plants beside curtained windows and keep rotating the plant so that all parts of it get even indirect light. You can also use grow lights to help support their development. The light requirement is low to medium. Water: As mentioned, Monstera is a typically low maintenance plant. You can water them once a week in summer and twice a week in winter. If the soil is wet, you can wait before watering it again. In presence of excess water, Monstera deliciosa experiences stunted growth. Humid: The Swiss Cheese plant loves humidity. You can use spray canisters to keep the air moist or even use a humidifier. During winters, when the weather is dry and radiators are on, make sure, your plant is placed in a well-ventilated position. Optimal Temperature: The best temperature for unimpeded growth of Monstera deliciosa is 65 – 85 degrees Fahrenheit. Fertilizer: If you are using standard potting soil,

How to propagate Swiss Cheese Plant? Read More »

What is Slugging Skincare

What is Slugging Skincare?

Slugging skincare isn’t simply the newest craze; you may have first heard the phrase “slugging” on Reddit or TikTok. For a long time, K-beauty regimes have included this technique. Slugging doesn’t truly involve slugs, for those slugging wondering who aren’t yet completely informed about this moisturizing method. To achieve radiant skin, you must slime your face with an occlusive, such as petroleum jelly, before night. However, this does involve acting somewhat like a slug. On your skin, occlusives function as barriers to keep moisture in. What is Slugging? Slugging is the practice of using petroleum jelly as the final step of your nightly skincare routine to your face. The K-beauty community popularized the habit on social media, but it’s crucial to remember that many civilizations have been doing this for years. The idea is that this helps keep the moisture from the other products you placed on top of the skin and prevents water loss. The texture is thick and slimy, resembling the slug’s mucus, which is how the style got its name. Benefits of Slugging Skincare The primary objective of slugging? keeping your skin moisturized. In other words, you might simply have radiant, plump, and dewy skin when you awaken following a night of sluggish, slug-like sleep. Here are some more benefits that go beyond the obvious ones that help make slugging a worthwhile beauty hack. It stops moisture evaporation: Occlusives rest on your skin’s surface. This substantial top layer guards against the process of water evaporating from your skin, known as TransEpidermal Water Loss (TEWL). TEWL is a normal biological process that becomes better with age. Your skin may naturally grow drier as you age and your skin barrier function may deteriorate. A rough night can help stop some of that TEWL so your skin retains moisture and reveals the difference. It shields your skin from potentially harmful factors: Do you like to turn up the heat as you sleep? Your skin may get dry as a result of the heated, dry air sucking away too much moisture. Skin can become dry due to environmental factors as well as ingredients in skin care products. In order to prevent these elements from sapping your skin of its essential moisture, you can help protect it by applying the protective layer of an occlusive of your choice. It replenishes lipids: Skin lipids, or the natural fats found in your skin, are crucial to the health and structure of your skin. They support healthy skin suppleness, prevent germs and other noxious intruders from entering, and help your skin remain hydrated. The lipids on and in your skin can be impacted by the same elements that cause moisture to be drawn out of the skin. However, according to research, using moisturizers with occlusives like petrolatum can restore lipids and repair the skin barrier. How to add Slugging to your skincare routine? 1. Cleanse Your Skin First It’s crucial to start your skincare routine by cleaning your face. Because there is no need to rinse with micellar water, it is quick, simple, and hassle-free. Utilize a cotton pad and the Micellar Cleansing Water to thoroughly clean your face. 2. Apply a Smooth Serum It’s all about layering on hydration when slugging. Apply a hydrating serum containing hyaluronic acid. 3. Using a moisturizer Applying a moisturizer will add an additional layer of hydration after that. It works simultaneously to moisturize the skin, firm the skin, and diminish wrinkles. 4. Add Petroleum Jelly on top Apply a thin layer of petroleum jelly to your skin with your fingertips. The ultimate result will be glossy and slimy, but that’s the point. 5. Get up and shower When you wake up in the morning, use your face wash and a moist cloth to remove the petroleum jelly to reveal gorgeous, glowing skin. How is it different from Moisturizing? While petroleum-based treatments are occlusives, meaning they trap in the moisture you apply to your skin, moisturizers hydrate your skin. Occlusives are impermeable, which lowers transepidermal water loss and improves skin moisture retention. On the other hand, despite the fact that products like petroleum jelly help to keep moisture in, they don’t truly moisturize the skin. Slugging doesn’t provide any moisturizing advantages of its own, but it can increase the advantages of your already-effective moisturizer. The two techniques are not interchangeable. Finally Skin care and beauty influencers on TikTok and other social media platforms may be responsible for slugging’s viral success. However, using occlusives like Vaseline to seal in the moisture of the skin is nothing new. Slugging is a secure beauty tip you may practice at home if you’d like to treat skin dryness or simply enhance your radiance. Want to get some general advice on establishing a unique skin care routine or seek treatment for ongoing skin issues? A board-certified dermatologist can provide more details on available therapies and assist you in beginning a skin care routine.

What is Slugging Skincare? Read More »

Wardrobe must-haves for the hard-working, corporate woman

Affordable Business Formal Wear Options

Great leaders always dress like it. First impressions are important. Whether it is a client meeting, an office conference, or just another typical weekday, business formal wear has become a great medium through which you can express your office personality. Gone are the days when men used to be the only breadwinners. With renowned women like Michelle Obama, Jacinda Ardern, Kamala Harris, and many more, women’s formal wear has a whole new market. It can clearly be seen that in order to make your stand, you need to dress like it. You can’t go to the office in your pajamas, except, of course, it’s pajama day in your office. Nowadays, formal wear is an excellent approach through which you can evince your professionalism and authority. When you have so many options, choosing the right one can be a gruesome task. Instead of rummaging through your closet, trying to pick an attire that would do the deed for the time being, having a few of these outfits would make your mornings much easier. And if you are on a budget, worry not my friend- online shopping is here to rescue you from this disaster! To save you from an impending calamity, we present to you: Wardrobe must-haves for the corporate woman Skirts One can never go wrong with a well-fitted skirt. A-line and pencil skirts are a great option to showcase yourself as a fierce and assertive woman. The right skirt would not only highlight your femininity but simultaneously help you in presenting yourself as a strong leader. You can opt for a high-waist pencil skirt to accentuate your curves. If you have a rectangular body shape, a mid-waist pencil skirt would be perfect for you. If you have an inverted triangle or an hourglass body type, a midi would be a great fit. Just make sure that the skirt is not too short or too tight as it might cause discomfort throughout the day, affecting your work. Trousers A major key to confidence is comfort. Gone is the era when only the men of the house wore pants. A nice, comfortable pair of trousers can definitely help to bring out your ‘A’ game. Wide-leg, straight fit, palazzos, bell bottoms, cropped or ankle-length trousers, khakis, jumpsuits- the options are endless! If you have a curvy or hourglass figure, bell bottoms or cropped trousers would be a great fit for you. Whereas, if you have a rectangular body type you can go for a palazzo or straight-fit pants. These are great options when you know you’re going to have a long day at work! Shirts, Blouses and Tops Once you know what skirt or trouser you’re going to wear, the next step is to pair it with a well-fitted blouse, top, or a shirt. If you are wearing a skirt, you should probably opt for a well-fitting blouse or a top. If you have narrow shoulder, you can wear a puff-sleeved or a bottle-neck top or blouse. If you have an hourglass body type, you can opt for a wrap-around top. When it comes to trousers, you can go for a well-suited shirt or a button up. It can be plain, striped or even checkered. Just make sure that you wear non-printed trousers along with a striped or checkered shirt to avoid a mis-matched outfit. If you want to take it up a notch, you can wear a blazer and suit it up! A nice blazer will give your outfit a more formal and domineering look. Dress It Up! If you are done with your boring old trousers and skirts, you can always pick a formal dress to wear at the office. You can choose from an A-lined or X-lined dress, a long-sleeved Seath dress, pegged dress, or pleated midis. These dresses are not only comfortable, but emphasize your body type as well. Once again, make sure that your dress isn’t too short or tight as it may be uncomfortable. Color and Fabric When it comes to business formal wear, you need to make sure that you don’t wear clothes that are too brightly-colored or gaudy. Keep it smart and simple. Always opt for pastels or dark colored clothes such as a pastel blue or green, or dark colors such as black, navy blue, maroon, etc. As you are in a formal setting, wearing loud clothes may be inappropriate. Moreover, make sure you buy clothes that are of comfortable fabric, especially cotton. Having a very thin or uncomfortable fabric can be a distress. Shoes Finally, to tie the outfit together, a nice pair of formal footwear is a must! There are endless options to choose from. If you are wearing a dress or skirt, you can go for formal, heeled sandals. You can opt for an open toe, platform, pencil, or block heels, according to your preference. If you are wearing trousers or a suit, you can go for formal loafers or shoes. You can also opt for a faux-leather pair of boots. When it comes to trousers or pants, you can wear sandals as well. The choice is yours to make. If you are not a heel person, you can always wear a pair of bellies or flat boots. Wrapping It Up Bring the outfit together by accessorizing it with a great watch, pendant or a bracelet. And hey! Don’t forget to wear the matching pair of earrings! You are now all set to steal the deal!

Affordable Business Formal Wear Options Read More »

Awakening Your Spiritual Senses – Dive Deeper into Life!

Awakening Your Spiritual Senses – Dive Deeper into Life!

“The spiritual life does not remove us from the world but leads us deeper into it.” ~ Henri J.M. Nouwen Each of us possesses a set of latent spiritual senses that are just waiting to be awakened. When we use the word “senses,” we are referring to the mind, which must be revitalized and connected to something greater than ourselves. You have heard people talk about spiritual awakenings and how they help individuals become more enlightened in their lives. But what do they mean precisely by “spiritual awakening”? Similar to how your physical body needs 5 primary senses to recognize the world around you, the five senses that make up our spiritual side can also help us recognize the spiritual reality that is all around us. No matter what you choose to call it—”nirvana,” “enlightenment,” or “bliss”—spiritual awakening starts the minute a person can take a step and “awake” to their existence with a fresh perspective on their place in it. What Causes A Spiritual Awakening? A good perspective is required for spiritual awakening to occur. You will come to realize that you have a greater purpose in life, which will lead to something that will transform your life for the better. Even though it has been demonstrated that one cannot initiate or force spiritual awakening, it occurs spontaneously as a result of any incident that leads to a discovery that may be both daily and life changing. How To Awaken Your Spiritual Senses? A key component to gaining spiritual sight is to use visualization during meditation and prayer in order to store pictures in your mind. Picture whom you want to pray to build and expand your ability to see visions in your dreams and gain inspiration from them. When we commit our senses to God, He strengthens them. While there are several reasons why spiritual awakening benefits you, such as a sense of oneness or living a meaningful life, there are also numerous ways to achieve this enlightenment. You can achieve the state of spiritual enlightenment in various ways. Some of these ways are mentioned below: 1. Give up on Your Ego It’s important to be able to see your ego for what it is – nothing more than a product of your own ideas. Relationships can deteriorate as a result of ego. Additionally, ego introduces the bitterness element into your existence. Put this unpleasant feeling to rest and choose positivism and modesty instead. You must be aware that such feelings can leave permanent scars on both you and your relationships. 2. Be True to Yourself Being honest with people is an important part of spiritual awakening. When you’re truthful with people, it can help you go along your spiritual journey more easily. At first, it may be tough to be truthful all the time, but if you keep practicing, it may become second nature to you. 3. Get Free from All Your Fears We all have anxieties and worries that can sometimes hold us back from taking on new challenges. But instead of letting our fears get the best of us, we should learn to embrace them. People who have attained spiritual enlightenment don’t allow their worries to control them – they act in accordance with their heart or mind. By doing this, we can free ourselves from the negative thoughts and behaviors that can keep us trapped in a cycle of worry and stress. 4. Learn To Forgive When individuals don’t meet your expectations, it can be easy to feel let down and even blame them for your negative feelings. However, holding a grudge against someone can end up hurting you more than anybody else. Instead, try to forgive them and move on. As the saying goes, “A forgiver is bigger than a mistake maker.” By forgiving others, you can also help to make peace with yourself and move forward. 5. Detach from the Materialistic World It’s okay to enjoy the things that the world has to offer, but it’s important to remember that they can only make you happy for a moment. The sooner you accept that, the closer you will be to finding true happiness. But distancing yourself from worldly possessions doesn’t mean that you have to live a life of solitude; it just means not depending on them for enjoyment. Instead, try to find happiness in nature, or within yourself. 6. Start Meditating and Practice Yoga People have long experimented with meditation in an effort to reach spiritual enlightenment. A great way to disconnect from the outside world and prepare your mind for self-awareness is through meditation. Yoga is another awesome method for achieving nirvana. Yoga is an excellent approach to achieving mental peace and quiet, in addition to making you feel physically stronger. You can tune out to the outside world and focus on your inner voice and ideas by practicing yoga regularly. 7. Learn to Spread Love As the universe believes, love is the most powerful force in the universe. Likewise, if you want to achieve spiritual enlightenment, you must work on loving yourself, your loved ones, and the natural world around you. Love gives birth to tranquil and peaceful feelings, and it is by experiencing these powerful emotions that we can gain a greater understanding of ourselves and the world around us. Once you are in the process of awakening your spiritual feeling, there’s no looking back. You have paved the way to attain the highest state of self-awareness and you now know you are leading on the right path. Just like the universe, the mind is vast and home to endless possibilities. Unleash what lies within you, that’s the greatest truth of life!

Awakening Your Spiritual Senses – Dive Deeper into Life! Read More »

Spooky Destinations to backpack around this Halloween

Spooky Destinations to backpack around this Halloween

The cracking noise from the half-opened door, that eerie whooshing wind, a cat crying somewhere far off, and distant foot-steps on the top-floor of a huge, abandoned mansion. Cliché, right? All of this was good when we were children and these things made us crawl into our parents’ bedrooms. Now, we need some real thrill in our lives. So, here are some places you could go backpacking this spooky season to get your kick from some actual creepy places. 1. Edinburgh Castle, Scotland This is castle is here since the Iron Age. So, you know how old castle and spirits go right? But it’s not just the old historical walls that give it the creeps, in fact during the day this is a great tourist attraction. The real spookiness happens at night when a spectral dog, a headless drummer, and a phantom piper roam the castle at night. Even researchers found ghost-sightings in the castle and since then people have only been scared of the place. 2. Island of Dolls, Mexico If the movie Annabelle didn’t scare, this place surely will. It is that little girl drowned in the Mexican Canal and when somebody moved to this island later, he was haunted by the girl’s spirit. To please the little girl’s spirit this man hung several dolls on trees and even might have sacrificed his nephew to give her a playmate in the afterlife. People report that they can hear laughing and whispering voices and observed that the eyes of the dolls follow them. 3. Screaming Tunnel, Canada Located in Ontario, this tunnel is right beneath the railway track Toronto to New York via Niagara Falls. Legends say a house burned on one end of the tunnel and a young girl from the house came running towards the tunnel for burning and screaming for help. It is said that if you try to light anything in the tunnel you hear screaming of voices of the girl and the it turns out the fire. 4. Bhangarh Fort, India Over 200 miles from Delhi, this fort stands tall in Rajasthan. It is said that a sorcerer tried to lure Princess Ratnavatil through magic and when she became aware of his evil plans, she ordered to get him killed. Before dying, the sorcerer cursed the town to be roofless and its people to die. Since then, every time a roof is built it collapses. It is one of the scariest places in India and the world and nobody is allowed to visit it after dark. 5. Aradale Lunatic Asylum, Australia Admit it, there is something strange about the mental asylums or at least the ones that are shown in tv shows. This one in in Victoria, is one of the largest mental hospitals. It is said that the ghost of Nurse Kerry haunts the women’s wing. Another ghost of a patient, who was forced to leave the asylum when it was shut down, is sighted in various parts of the asylum. The asylum was said to be the home of many lunatics. 6. Tao Dan Park, Ho Chi Minh City, Vietnam The beautiful garden during day, turns different in the night. It is said that the ghost of a man killed in one of the attacks still wanders there in search of his love. 7. The Catacombs of Paris, France Do I need to say anything else apart from the fact that the remains of more than 6 million people lie there in the undergrounds of the tunnel. You may take a tour as some parts of the tunnel is open for tourists, see for yourself and experience the horror. 8. Casa Loma, Toronto, Canada This Gothic-style is filled with corridors and secret pathways, and of course creepy stories. There have been sightings of ghosts all around the mansion, which is also open for tourists. And because the builders knew that hunger could make even the sanest people mad and scary, there are also two restaurants open for the visitors.

Spooky Destinations to backpack around this Halloween Read More »

10 simple workouts at home you need to try!

10 simple workouts at home you need to try!

So you want to work towards your fitness but going to the gym seems an ordeal? Managing time can be quite grueling when you slog hour after hour in your workplace. So, why not bring the gym to your house? Here are ten simple workout programs you can try at home. The best thing about these workouts is that they are free-hand exercises and do not require lifting weights and using heavy machinery. Simple workouts at home that can help you get started anywhere and at any time. Before you get started on flexing those muscles, however, there are pre-workout steps that you need to follow to maximize your workouts at home. Dedicate 30-60 minutes every day to working out at home. Clear out a space for your workout, make room and keep it airy & well-ventilated. Choose a comfortable athleisure for your workout session. Keep towels handy to wipe off that sweat. Always choose a playlist consistent with your workout regime. And finally, maintain a daily tracker that includes your weight, height, and workouts completed to track progress. All right, so now you have the basics ready. It is time to shed those calories in style. 1. Bridge: The perfect exercise to warm up your body, bridges will help you activate your core and posteriors. How to do it? Lie down on your back. Bend your knees. Place your feet flat on the ground and extend your arms by your side. Then push your feet and brace your core. Slowly, lift your core until your hips are fully extended, and squeeze all the glutes to the top. Return to the starting position and repeat. Frequency: 3×15 (3 sets of 15 repetitions each) 2. Squat: Strengthen your legs and core with Squats to help with your mobility. You can master the form by placing a chair underneath. How to do it? Stand with your toes pointed slightly outwards and with your feet and shoulder wide apart. Bend your knees and hinge your hips. Sit until your bottom levels with your knee and rise back to the starting position by pushing through your heels. Frequency: 3×15 (3 sets of 15 repetitions each) 3. Pushup: There are several variations to a pushup. The standard pushup will help build muscles in your shoulders and chest. A pushup is a foundational exercise everyone must try. How to do it? Lie down on your chest. Place your hands wider than your shoulders. Straighten your arms and legs. Lift your body by pushing yourself back via the arms and the shoulders. Hold the position. Lower your body until the chest touches the floor. Repeat. Frequency: 3×10 (3 sets of 10 repetitions each) 4. Lunge: One exercise, three pressure points to flex. Lunges are the perfect way to flex your quads, hamstrings, and glutes. How to do it? Place your right leg flat in the front. Keep your left foot up on your toes. Bend your knees and take your lower body down in a single motion. Stop when your thighs are parallel to the ground. Push back up through your right foot to return to the starting position. Switch feet and repeat. Frequency: 30 secs on each leg. 5. Plank: A perfect exercise to work on your upper body and shoulders without using weights. How to do it?  Lay down on your elbows. Keep your elbows under your shoulders. Keep your hands flat and activate your core. Press your forearms and knees against the floor and raise your body in a straight line. Hold the position. The shaking in your legs & arms means you are working your abs. Frequency: 3 sets of 30 secs each. 6. Burpees: Taken from calisthenics, this exercise works on all major muscles. A 125-pound person can lose up to 200 calories by doing Burpees for 20 minutes. This is pushups, squats, and jumping all combined into one. How to do it? Start in a squat position. Knees bent, back straight, feet apart. Lower your body with hands in front of the body, inside your feet. Kick back with your feet so that you land on your hands in a pushup position. Keeping your body straight, complete one pushup. (Do not bend your body) Frog kick to jump on your feet to the starting position. Stand upright. Reach for your arms over your head. Jump in the air and get back to the squatting position in one swift motion. Repeat. Frequency: 20 Burpees Per Minute. 7. Jumping Jacks: A perfect exercise to work out at home, Jumping Jacks derives its form from plyometrics that combines aerobic exercise & resistance work. Get extra work for your glutes, quadriceps, and hip flexors with this simple and beginner exercise. How to do it? Start with a normal standing stance with your arms by your side and legs straight. Jump up by spreading your feet beyond your hip-width while extending your arms over your head. Jump again to go back to the starting position. Repeat. Frequency: 2×10 (2 sets of 10 repetitions.) 8. Skipping: One of the most well-known workouts at home. This simple yet effective exercise will help tone your muscles and work on your calves, upper body, thighs, and shins. How to do it? Grab the handles of your jump rope in each hand with the rope behind you, near your heels. Rotate your wrists and forearms and swing the rope over your head As the rope swings over your head and passes your shin, jump on your toes. Timing is crucial. Let the rope swing underneath your toes back to the starting position, behind you, near your heels. Repeat. Frequency: 30 minutes. 9. Deadlift with Resistance Band: Effective at building your legs, glutes, back, core, and posture, this workout requires a resistance band. And although traditionally, this workout is performed with barbells, resistance bands work simply fine for your workout at home. How to do it? Stand with your feet flat on the ground and placed at hip-width apart.  Place the

10 simple workouts at home you need to try! Read More »